If you have a PC with a Nvidia graphics card, you can leverage this easily for training AI models with a few easy steps. The only prerequisite is that you have a modern version of Python installed (3.8-3.11). You can check your python version by opening up the Command Prompt on Windows and typing the following:
C:\Users\you> python --version After that you’d want to install pip. First curl to get the install script:
curl https://bootstrap.pypa.io/get-pip.py -o get-pip.py
Then:
python get-pip.py
Before installing anything else we’re going to want to get the Nvidia CUDA toolkit and the cuDNN package. For these, we’re going to need a Nvidia developer account, it is free to sign up and Nvidia will prompt you to sign up if you visit the download pages below.
CUDA Toolkit:
https://developer.nvidia.com/cuda-downloads?target_os=Windows&target_arch=x86_64
cuDNN:
https://developer.nvidia.com/rdp/cudnn-download
A couple of notes on these:
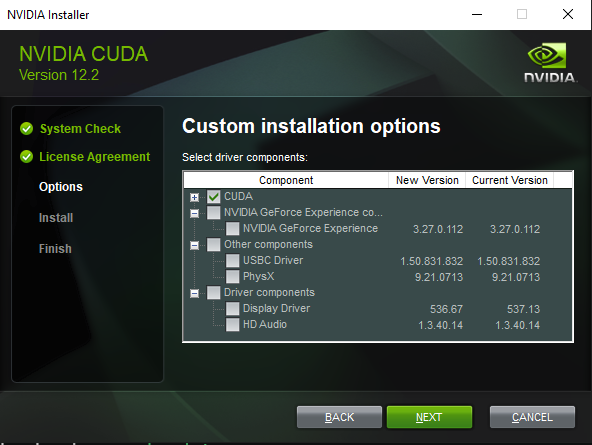
If you have already installed GeForce Experience and maintain updated drivers, its likely the CUDA toolkit’s default installation will try to overwrite your driver / install GeForce and other things again. You can click Custom as below:

Then you can uncheck for things you have already installed, or if you have a newer driver than they are specifying. CUDA will by default install the oldest driver its compatible with, but newer drivers are ok
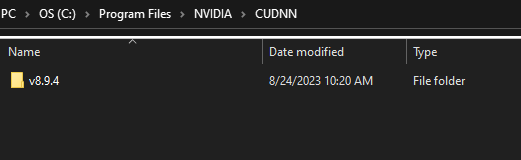
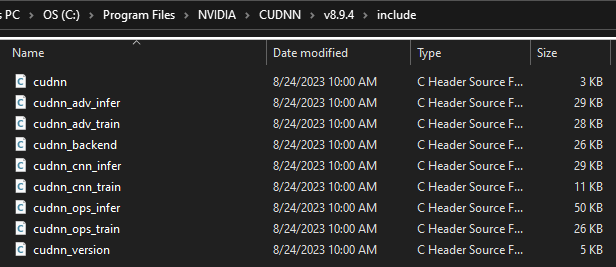
With that installed, we can move to cuDNN. Nvidia has a great install guide for cuDNN here that is not on the download page. The one tricky part of this installation is they ask you to move the downloaded files from your extracted directory to C:\Program Files\NVIDIA\CUDNN\v8.x\
The way I handled this was to open up File explorer and just drag and drop everything over. I already had other ‘Nvidia Something’ folders in my program files but I added the separate “NVIDIA” folder as specified.

On the download page, they show the version here:

You can match the version like above, then copy the files over as their how-to describes:
After all this, its time to install pytorch. First you want to head to the pytorch website. Once there, they have a script builder for a pip installation. Because I downloaded CUDA 12.1, had to use the Preview (nightly) build. Now, if I were setting this up at work, I’d probably not do this, but for personal projects this is fine. Also notice the ‘pip3’ in the script it generates, this is not necessary if your ‘python’ is pointing a version of python 3.

You can thus write that as:
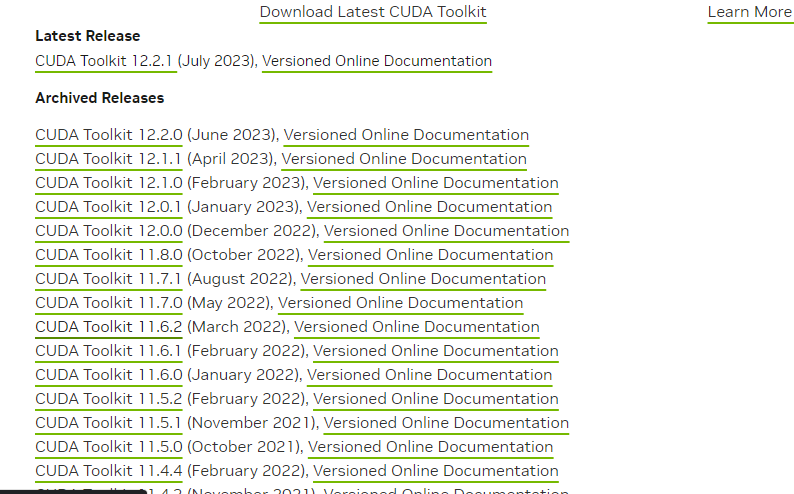
pip install --pre torch torchvision torchaudio --index-url https://download.pytorch.org/whl/nightly/cu121It’s important when using this tool to match your CUDA Toolkit version, not the cuDNN version we made the folders for. With that said, I noticed I have 12.2 and a 12.1 CUDA pytorch worked fine, so I assume close versions are ok but if not, they do maintain a release archive here where you could get 11.8 or whatever version is listed as the stable release.
Once you’ve installed pytorch like this, you can check if its working with the following program (here’s a pastbin if you’re feeling extra lazy):
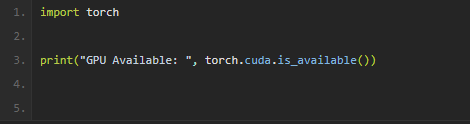

It takes maybe 5-10 seconds, at least on my machine, for this output to generate. I named my file 3dgan.py because I was testing something another user made, but you could name yours ‘test.py’ or whatever suits you.
Now that everything is configured what can we do? Well, if you go to this pastebin I’ve included an image generator I made with ChatGPTs help as an example. It’s nothing revolutionary but it will put your GPU to work.
You can run that program by simply calling “python image_generator.py” or whatever you name it, within the directory where you made the file.
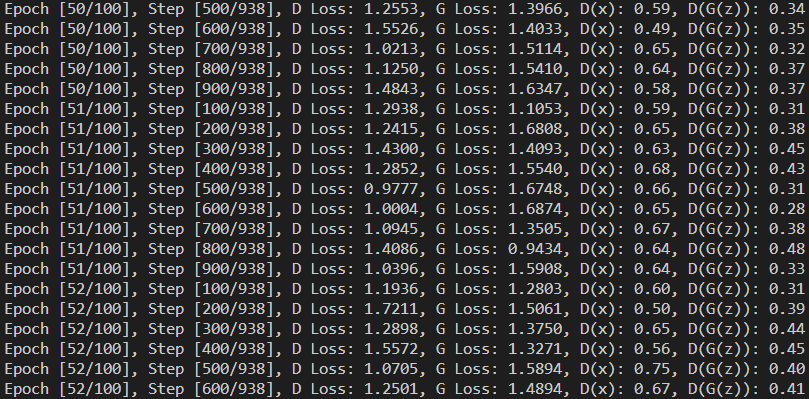
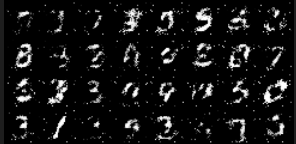
This file runs a GAN with the mnist data set, a default in pytorch, and generates images as a basic example. Once its done running you should see a couple new files and a folder with generated images.
There’s a lot more you can do with this capability, and I’ll be covering that in future posts. For now, that’s how you turn your PC into an AI machine. Please subscribe to my Adopting AI newsletter below for more.
Leave a Reply